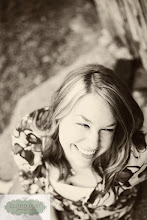
Mia had her first dance class this past Wednesday night! She absolutely LOVED it! She looked so adorable while she was dancing to. I'm not trying to brag, but she was one of the best behaved kids in there. It's a class of 3, 4 and 5 yr olds, and I am amazed they can keep their attention for more than 5 seconds! Mia couldn't stop talking about the fun music and getting to tap.....She's asked me like 20 million times if it's time for dance class yet! LOL. Here are a few pics of her in her lovely leotard, ready to head to class......
Elaina had a birthday party to go to this past weekend, the first invite from a classmate this year. She was really excited cos it was at Skatetown. She wanted to make her friend a birthday present (I've created a monster!!) so I took her to Hobby Lobby and talked her into making lip gloss and decoupaging a box for her friend. While there, she decided to bead a necklace for her too. I was a bit worried about making lip gloss, I've never done it before, but the library was a great source. I'll post the recipe at the end of this post :)

Lucious Lip Gloss
1/4 C vegetable, olive, or sweet almond oil
1/4 oz or 1 tsp of beeswax chopped into small pieces or grated
4-5 drops of essential oil; be sure it is FOOD GRADE
1/8 tsp Wilton Glycerine
heat safe, disposable plasic cup
disposable spoon or popscicle stick
6 empty, clean dry mini mint tins or old lip balm pots (we used Altoid Small tins)
OPTIONAL:
1 vitamin E capsule
Lipstick
Wilton glitter
MAKE THE BASE:
1. Pour oil in the cup and add beeswax. Microwave oil and wax for about one minute, stirring every 20 seconds, until wax is completely melted. (the cup will be really HOT)
2. Test the consistency of the base. You can do a glossy gloss similar to vaseline, or a more creamy, harder gloss. Dip the spoon in the melted mixture and let the excess drip off. Put it on a piece of foil and pop it in the freezer for a few minutes. If it's too hard, or you want an even glossier finish, add a few drops more of oil. If it's too soft, add a bit more beeswax and stir to re-melt. If the wax isn't completely melted, microwave the cup for 10- 15 seconds more and stir.
To MAKE IT AWESOME:
1. Add the essential oil and stir well (make certain you have food grade oils. I found some limited ones at Hobby Lobby in the soap making section. most health food stores have a TON of them)
2. Stir in the Glycerine. You don't have to use it, but it adds moisture and makes the gloss smooth and silky
3. Pierce a vitamin E capsule and pour the contents into the melted oil and wax. Vitamin E is a moisturizer and helps preserve the final product.
4. Take a small chunck of a lipstick and add it to the melted oil and wax. The lipstick won't add alot of color to your lips, but will color the gloss and make it look nice. ( I had to pop it in the microwave for a few secs to get it to incorporate)
5. If you want to really sparkle ( and we sure did....ALOT) add a pinch of superfine glitter (Wilton makes one for cakes in several different kinds) to the mixture
TO FINISH IT UP:
1. When you are all done tinkering, pour it into the tins or jars. Be sure to check if there are holes by the hinges (there were in our tins) Make sure you don't fill it up past those holes, and also dont fill up old lip pots too full either.
2. Let it sit UNDISTURBED for 20 minutes
Recipes:
Pink Lemonade Gloss:
gloss base + lemon essential oil + Chunch of pink lipstick + glitter
Orange Creamsicle Balm:
balm base + orange essentail oil + vanilla oil + piece of orangy lipstick
Lavendar Fields Balm:
Balm base + lavendar essential oil + plum lipstick (this is the one we made)
Cinnamon Clove Gloss:
gloss base + clove oil ( only one or two drops)+dash of cinnamon+ brownish lipstick
You can use your imagination too...if you can eat it, you can use it in your gloss or balm! Hope you have fun making this! I know Elaina and I really did. I can't wait to make more and play around with different combos of stuff!


